A webinar the host isn’t recording, a talk you want as audio for the commute: when people look up how to record audio on a PC, they usually want what the computer is playing, and the microphone is beside the point. The recorders built into Windows and macOS only capture microphones. For the rest you need Audacity on Windows, and on a Mac a method that depends on your version of macOS.
Record your computer’s audio on Windows
Windows can hand whatever goes to your speakers back to a recording app. This is called loopback, and Audacity, which is free and open source, supports it. In our view it is the cleanest method on Windows: the sound stays digital end to end, with no cable and no driver to install. The Audacity manual covers the procedure.
- Install Audacity from audacityteam.org. Sites offering their own “installer” often bundle software you don’t want.
- Open Audio Setup (the Audio Setup button, or Edit > Preferences > Audio) and set the host to “Windows WASAPI”.
- For the recording device, pick the output you are listening on, followed by “(loopback)”: for example “Speakers (loopback)” or your headset’s name.
- Start the video or call, then press Audacity’s red Record button.
- If Audacity shows an error in mono, switch to 2 (Stereo) recording channels.
Audacity pauses the recording while nothing is playing and resumes when sound comes back, so pausing the video leaves no gap in the file. Everything sent to that output is captured too, including the chime of a Teams notification. Turn on Do Not Disturb before you start.
The older method uses a “Stereo Mix” input, which some sound cards provide. It lives in the classic Sound control panel (Settings > System > Sound > More sound settings), on the Recording tab: right-click the list, check “Show Disabled Devices”, then enable Stereo Mix. Plenty of recent laptops don’t have it at all, because it depends on the audio driver. If it isn’t there, stop looking: WASAPI loopback does the same job.
Record internal audio on a Mac
On a Mac, Audacity can’t see the computer’s own sound. Its manual is blunt about it: Macs have no built-in way for an app like Audacity to record audio playing on an output device. Voice Memos and QuickTime only record microphones. That leaves three options, from simplest to most fiddly.
On macOS 27 or later, the Screenshot app can include system audio in a screen recording, according to Apple Support. Press Shift-Command-5, choose a screen recording, open Options and select “Include System Audio”. Command-Control-Esc stops it, and the .mov file lands on your desktop. To keep only the sound, open it in QuickTime Player and choose File > Export As > Audio Only, which gives you an AAC audio file per the QuickTime guide. This is the route we recommend on an up-to-date Mac, because it installs nothing.
On macOS 13 to 26, OBS Studio, free and open source, captures desktop audio or a single app’s audio with no extra driver, according to its macOS guide (the “macOS Audio Capture” source in OBS 30 and later). OBS produces a video; QuickTime’s Audio Only export pulls the sound out.
The third option is a virtual audio driver such as BlackHole, open source (GPL-3.0) and compatible back to macOS 10.10. You install it, set it as the Mac’s output, then select it as the input in Audacity or QuickTime. While it is the output you hear nothing, so you create a Multi-Output Device in Audio MIDI Setup with the built-in output at the top of the list, as BlackHole’s documentation explains. It works, but budget half an hour of setup the first time. Keep it for Macs too old for the other two methods, or for when you want the sound straight in Audacity.
Computer audio and your voice together
Commentary over a game, a video call where your side must be on the recording, a narrated demo: these need two sources mixed. Audacity’s loopback only captures the output, so your mic is missing from it.
On both Windows and Mac, OBS Studio is the most direct tool. Out of the box it records desktop audio and the microphone together, each with its own volume slider in the mixer, so you can keep the video below your voice. The file is a video, and you can extract the audio afterwards. On a Mac running macOS 27, the Screenshot app does the same with nothing to install: in Options, choose a microphone and also select “Include System Audio”.
For a video call, the meeting app itself is often simpler. Zoom offers local recording to your computer on free accounts, per its help center, and it captures every voice, yours included. Participants see a recording indicator, which also takes care of telling them.
Watch out. Recording a video call means recording other people’s voices. In France, tell the participants and have a legitimate reason; the details are in Recording a work meeting in France and Recording a phone call in France.
Record your voice on Windows 11: Sound Recorder
The Windows 11 voice recorder is called Sound Recorder; on Windows 10 it was Voice Recorder. Type its name in the Start menu: it comes preinstalled. The shortcuts come from Microsoft’s FAQ: Ctrl+R starts, Space pauses, Esc stops and saves. A single file can run up to three hours, and you can keep working in other windows meanwhile.
You choose the microphone inside the app, without changing Windows’ default mic. The format is set in the app’s settings (the “…” menu): M4A by default, or MP3, WMA, FLAC and WAV. Where exactly those settings sit has moved between updates.
To find a file, right-click the recording in the list and choose “Show in folder”. On recent versions it is a Sound recordings folder inside Documents, but the right-click is the reliable route, since that folder has changed across versions.
Watch out. Microsoft’s FAQ warns that uninstalling the app deletes your recordings. Copy the files elsewhere before you remove it or reset the PC.
Record your voice on Mac: Voice Memos or QuickTime
Voice Memos is the quickest: open it, click Record, then Done. It takes the built-in mic, a supported headset or an external microphone, and recordings show up on your other Apple devices signed in to the same account, per the Voice Memos guide. In Voice Memos > Settings, pick Lossless if you plan to edit the sound, Compressed otherwise. The Enhance Recording option reduces background noise and echo on playback.
QuickTime Player is the one to use when you want a file right away, to attach to an email. Choose File > New Audio Recording, then the small menu next to the Record button to pick the microphone and quality. According to Apple’s documentation, High records 44.1 kHz AAC and Maximum records uncompressed 24-bit AIFF-C, which is far heavier. Option-click the button to pause. Finish with File > Save.
Clean up and export in Audacity
A steady fan or air-conditioning hiss comes out reasonably well. Select a second or two where you hear only that noise, open Effect > Noise Removal and Repair > Noise Reduction and click “Get Noise Profile”. Then select the whole recording, open the effect again and apply it. The manual warns that pushing it too hard creates artifacts, a tinkly, metallic sound that can be worse than the original noise. Start low and listen back.
The .aup3 file Audacity saves is a project that only Audacity opens. To get an actual audio file, use File > Export Audio: WAV if someone will edit it further, MP3 to send it.
Online voice recorders: where the file goes
Online voice recorder sites ask for mic access, record, and offer you an MP3. Some do everything in the browser, and the audio only leaves your machine when you download the file. Others upload it to their servers to convert or store it, and the home page rarely says which. Look for the answer in the privacy policy. If it says nothing, assume the audio is uploaded.
For reading a poem aloud on a work machine where you can’t install anything, these sites will do. For a conversation with a client or a patient we advise against them: Windows Sound Recorder does the same job without sending anything anywhere, and so does Voice Memos if you turn off its iCloud sync. Also revoke the mic permission you gave the site. In Chrome it is under Settings > Privacy and security > Site settings > Microphone, per Chrome Help.
How long you can record, and how big the file gets
Windows Sound Recorder caps each file at three hours. Voice Memos, QuickTime and Audacity state no limit in their documentation; in practice your free disk space decides, and how much space a recording takes depends mostly on the format. Here is what one hour of audio weighs, worked out from each format’s bit rate:
For speech, a 128 kbps MP3 sounds no different from a WAV. WAV only earns its size if you are going to cut or clean the audio. When sending, Gmail won’t attach files over 25 MB and swaps in a Google Drive link instead, per Gmail Help. At 128 kbps, that limit falls at about 26 minutes of MP3.
Mic not detected or too quiet
When an app hears nothing, the cause is usually a permission that’s switched off. On Windows 11, open Settings > Privacy & security > Microphone and check three toggles: “Microphone access”, “Let apps access your microphone”, and “Let desktop apps access your microphone”. The last one covers Audacity and OBS, which don’t appear one by one in the list (Microsoft Support). On a Mac, go to Apple menu > System Settings > Privacy & Security > Microphone, turn the app on, then relaunch it (Apple Support).
The other common cause is the app listening to a different mic from yours. A webcam, a monitor or a Bluetooth headset each add their own, and the app doesn’t necessarily use the one the system picked. Check the choice inside the app itself. With a Bluetooth headset, sound often turns muffled as soon as its mic is active, because many headsets drop into a lower-quality phone mode. Record with another mic and keep the headset for listening.
If the sound is too quiet, move closer before touching any setting: about 8 inches (20 cm), slightly off to the side so your p’s don’t pop. A laptop’s mic sits next to the keyboard and the fan, and a cheap headset mic near your mouth does better. Then raise the input volume: Settings > System > Sound > Input on Windows, System Settings > Sound > Input on a Mac. Do a ten-second test. In Audacity, peaks should stay below the top of the meter, because clipped audio can’t be repaired.
When a computer is not enough
If you record at your desk, the computer is enough, so keep it. It falls short when recording happens away from the screen (at a client meeting, on a site visit, in a consulting room) and every file then has to be transferred, transcribed and summarized.
That is the case we designed Notus for. It fits in a pocket and has a single button: you set it on the table, press it, and there is nothing to transfer afterwards. About thirty seconds after the recording ends, the transcript, with speakers separated, and the summary reach your phone. The audio is processed in Europe by open-source and European models, then deleted as soon as the note is ready (within 48 hours at most at our processors). It is never used to train an AI, and your notes are hosted in France. The included free plan covers 50 hours of recording a month.
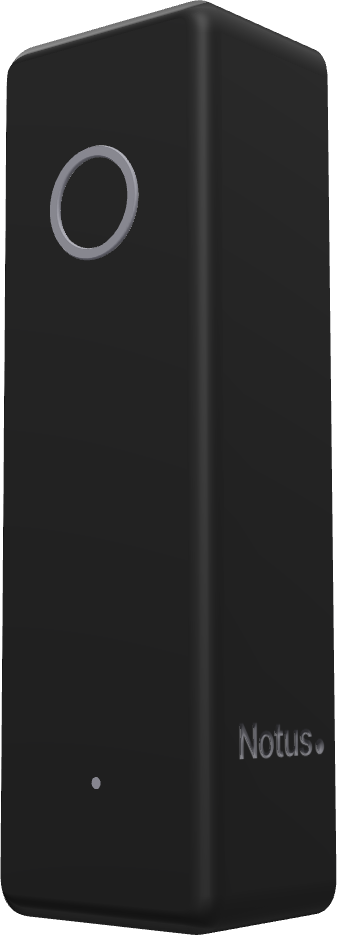
Notus is available for pre-order, shipping in the first half of 2027. See how it works
To record with your phone instead, see Voice recorder on iPhone and Android; to compare the device families, see How to choose a voice recorder.
Frequently asked questions
How do I record the audio from a YouTube video on my PC?
On Windows, with Audacity set to the Windows WASAPI host and your speakers’ “(loopback)” input. On a Mac, with the Screenshot app (macOS 27 and later) or OBS. The video is still under copyright: recording it for yourself doesn’t give you the right to republish it.
Where is the voice recorder on Windows 10?
It is called Voice Recorder on Windows 10 and Sound Recorder on Windows 11. Either way, type the name in the Start menu. If it has been uninstalled, you can reinstall it for free from the Microsoft Store.
Can I record straight to MP3?
Yes with Windows Sound Recorder, by changing the format in its settings. Voice Memos and QuickTime record M4A or AIFF; for an MP3, export it from Audacity.
How do I turn the recording into text?
Word for Microsoft 365 transcribes an uploaded file, and Whisper does it for free on your own computer. The steps are in How to transcribe audio to text. Audio recorded close to the mic in a quiet room means less correcting afterwards. To write by speaking, with no audio file at all, see Voice dictation. If you often record away from your computer, an AI recorder such as Notus skips this step: the transcript and summary arrive about thirty seconds after the recording ends.